
Le logiciel hors ligne EsaBend est un outil puissant conçu pour les applications de pliage de précision, permettant aux utilisateurs de simuler et d'optimiser efficacement les processus de pliage. Ce guide décrit étape par étape la procédure d'installation d'EsaBend, garantissant une configuration fluide. Que vous ayez besoin de Installation d'EsaBend Trandy CN, EsaBend Classic CN ou PC hors ligneCe tutoriel vous aidera à installer correctement le logiciel et à configurer les paramètres nécessaires. Nous vous guiderons également dans la configuration. bibliothèques d'outils et modifier les fichiers de configuration essentiels pour activer le mode simulateur. Suivez les instructions ci-dessous pour télécharger, installer et exécuter EsaBend sur votre PC en toute transparence.
Étape 1 : extraire le package d’installation et exécuter Setup.exe
Après avoir téléchargé le logiciel hors ligne EsaBend, extrayez tous les fichiers dans un répertoire local. Localisez le Setup.exe fichier et double-cliquez dessus pour commencer le processus d'installation.

Étape 2 : Lancer l’interface d’installation
Une fois l'installateur lancé, vous verrez l'interface d'installation d'EsaBend. Cliquez sur le Suivant bouton pour passer à l'étape suivante.
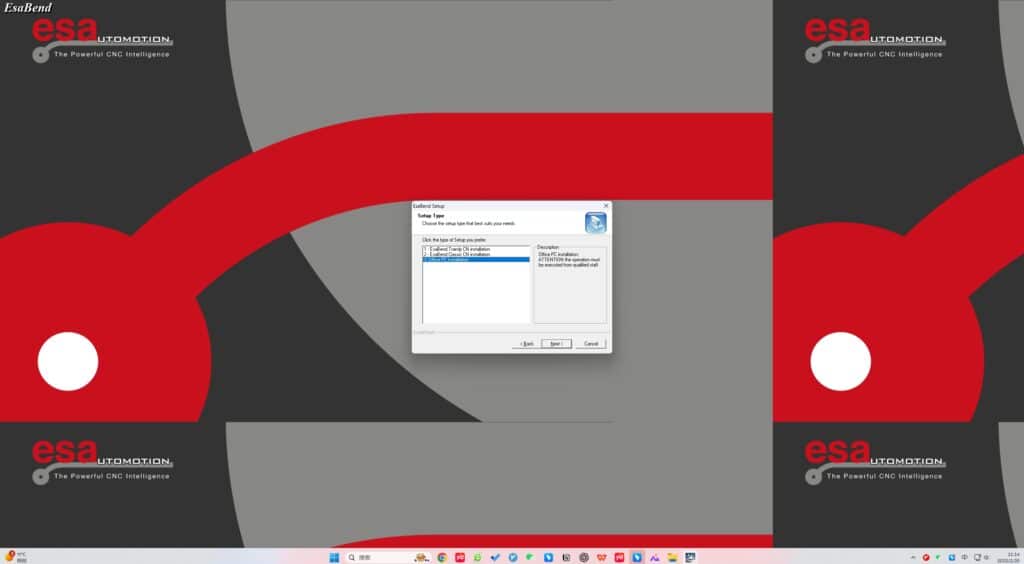
Étape 3 : Sélectionnez le type d’installation
Trois options d’installation vous seront proposées :
- Installation de l'EsaBend Trandy CN
- Installation CN EsaBend Classic
- Installation PC hors ligne
Sélectionnez l'option qui correspond le mieux à vos besoins et cliquez sur Suivant pour continuer.


Étape 4 : Choisissez votre modèle EsaBend
Sélectionnez l'EsaBend approprié modèle correspondant à la configuration de votre machine. Cliquez Suivant une fois que vous avez fait votre choix.

Étape 5 : Sélectionner les bibliothèques d’outils
EsaBend prend en charge diverses bibliothèques d'outils pour améliorer la précision. Choisissez parmi les options suivantes :
- Timbre-poste européen
- Tecnostamp
- Wila
- Wilson
- Rolleri
- Gimec
- Galender Press
Sélectionnez les bibliothèques requises et cliquez sur Suivant pour continuer.

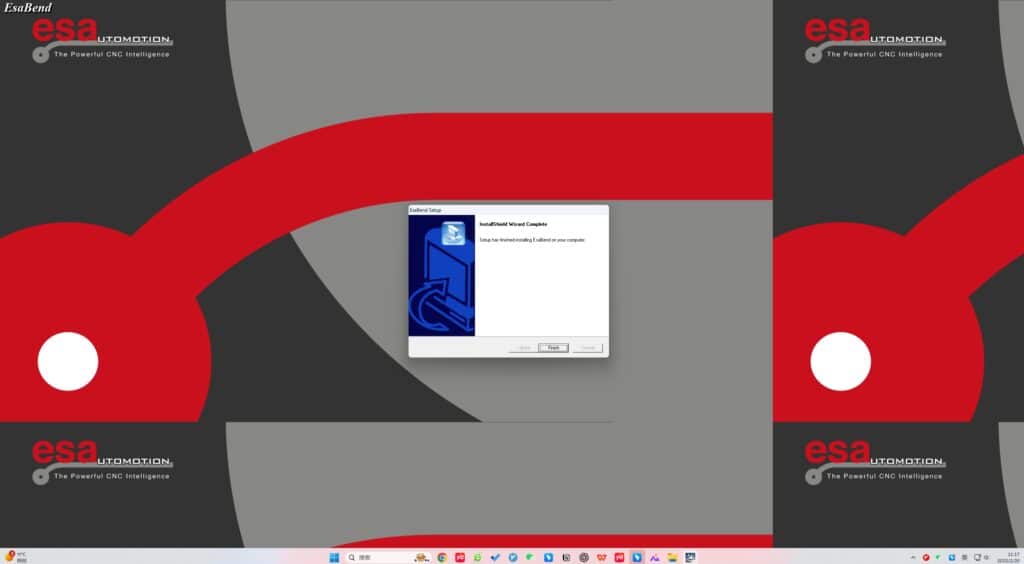
Étape 6 : Terminer l'installation
L'installation est maintenant terminée. Une fois terminée, cliquez sur Finition pour quitter l'assistant d'installation.

Étape 7 : supprimer le fichier Autosetup.ini
Accédez au répertoire suivant :C:\EsaBend\Kvara\Exe
Recherchez et supprimez le fichier nommé Autosetup.ini pour assurer un fonctionnement fluide.

Étape 8 : modifier Kvara.ini pour activer le mode simulateur
- Aller à
C:\EsaBend\Kvara\Exe - Localiser le fichier Kvara.ini
- Ouvrez-le à l'aide d'un éditeur de texte (par exemple, le Bloc-notes)
- Modifier la ligne LIEN=SIMULATO comme indiqué dans l'image de référence
Enregistrez les modifications avant de fermer le fichier.

Étape 9 : Lancer le logiciel
Une fois les configurations définies, localisez le EsaBend Cliquez sur l'icône du bureau et double-cliquez dessus. Le logiciel devrait maintenant se lancer correctement.

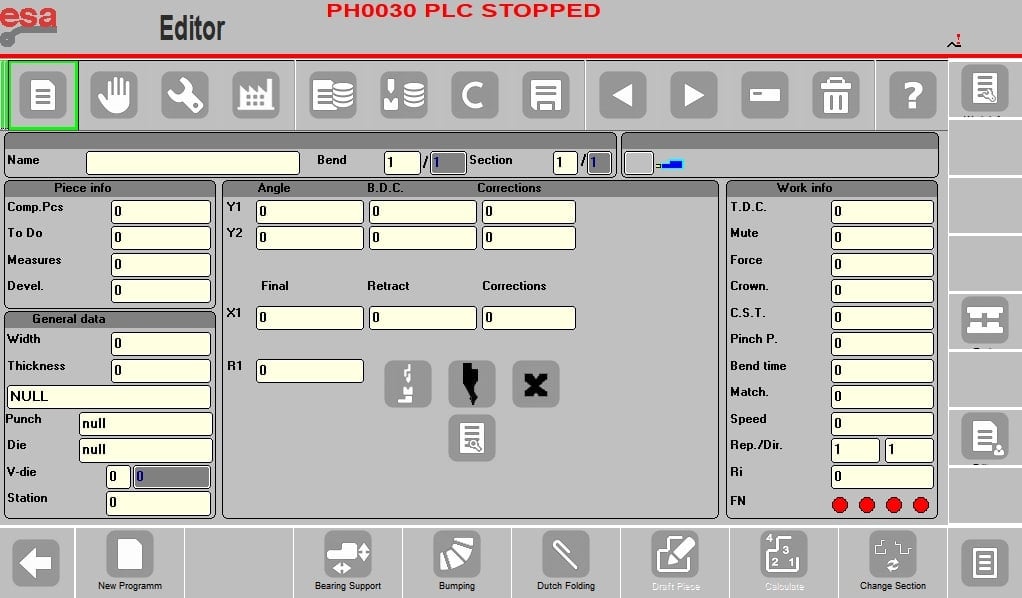
Étape 10 : Accéder à l'interface EsaBend
Après avoir exécuté le logiciel, vous accéderez à l'interface principale d'EsaBend. Vous pourrez alors commencer à utiliser les fonctions de simulation et de programmation de pliage hors ligne.
Conclusion
En suivant ce guide d'installation étape par étape, vous pouvez facilement configurer le logiciel hors ligne EsaBend et l'optimiser pour simulations de flexion. Assurez-vous de sélectionner le bon type d'installation, bibliothèques d'outils et configuration du modèle Pour des performances optimales. En cas de problème, consultez le guide ou contactez l'assistance technique. Commencez à utiliser EsaBend dès aujourd'hui pour améliorer l'efficacité de votre processus de pliage !
Comment accéder à la configuration du CNC esa
veuillez contacter notre équipe de service
https://www.harsle.com/support/
paramètres Mot de passe??
vous pouvez l'utiliser directement, pas besoin d'utiliser le mot de passe
How do I access the 3D function?
If you buy the machine from us, we will provide the dongle to activate